Wednesday 26 November 2014

How to Get Started with Coding in Your Classroom with the Hour of Code

The Hour of Code is an excellent resource for both teachers and students alike. If you have never heard of the Hour of Code before, or have never tried any coding whatsoever, then this is a guide to get you started. Here is a great video to get you and your students excited about learning to code:


If you don't have access to YouTube here is a link to the video on Vimeo: http://vimeo.com/105356600

Coding is just an algorithm that speaks to a machine, and tells it to do things. There are many different languages, and it can be very confusing to stare at a black box on your screen and try to type out a line of code, making sure you got the spacing and strange symbols all pointed the same way.


The Hour of Code is nothing like that. You and your students are presented with colourful blocks that can be dragged and dropped into place to control a variety of variables. They are clearly labelled and it is very accessible for all ages.


Last year my class participated in the Hour of Code and we took about an hour and a half to completely finish as a class. We worked together, so that if one student finished a level early, then they became the teacher, circulating through the room giving hints to other students to help them be successful as well. This collaboration helped us to all be successful, and the experience was both educational and enjoyable for all students.


Afterwards I extended the learning in my class, and started a Primary Coding Club, and a Junior Coding Club. Before the Hour of Code, I knew little, to nothing about Coding. I have been learning with my students. I decided I didn’t need to be an expert, and instead we learned and solved puzzles together as a class.


The Hour of Code website has a variety of options available to help your class get started:

Unplugged Coding: A great way to introduce students to the language of coding.

The Online Beginner’s Course: This is what I did with my Grade ¾ class.
Kindergarten and Grade 1 students have options as well. Both Kodable and The Foos offer excellent apps for portable devices that require little, to no reading to use. They are very engaging, and teach the same key concepts as block coding.


Daisy the Dinosaur introduces the concept of block coding in an easy format that works well for students who have successfully used Kodable and The Foos. It introduces one concept at a time, but does require some reading.


Hopscotch is a more advanced app that introduces many more variables that students can control.


Another option is Lightbot. The great thing about Lightbot is that it is available on computers, Android tablets, and iOS devices. If your students bring their own devices to school, this app makes it easy to still participate in the Hour of Code. Just make sure the students download the app ahead of time, the Hour of Code version is a free app, but I have found that not all my student’s have their passwords to download apps at school. I also recommend purchasing the full app to extend the learning, it is a great app that my class has used extensively with great results!


Codecademy has an Hour of Code tutorial on Javascript that is a good follow up to block coding for students ready to take on a new challenge.


There are hours and hours of additional activities available for free at Code.org's website to extend the learning. And here is a link to other coding apps and websites: http://technorookie.blogspot.ca/2014/04/kids-can-code-apps-and-websites-weve.html


If you are looking for a next step after introducing coding to your students. There is a big world of coding and robots you can access. I have been looking for an inexpensive way to take that next step with my class. Thanks to Brian Aspinall, an educator who has forgotten more about coding than I will ever learn, I was introduced to snapcoding.com, and there are tutorials here to code instructions for a Sphero, or a Finch Robot. What I like most about the Finch robot is that it comes full circle, it is a modern version of the "turtles" that Seymor Papert was using with children coding way back in 1972. 


Good luck! I think you will enjoy the experience and I know your students will! Good learning for our students comes when we push them gently forward from what they already know, making them slightly uncomfortable in the process. Get slightly uncomfortable and learn a new skill along with your class. I can tell you it is a very rewarding experience!

Sunday 16 November 2014

How to get Started with Minecraft Pocket Edition in the Classroom

Minecraft pocket edition is an excellent resource that is available to teachers that have iPads or Android tablets in the classroom. It is not a cheap app to purchase, but it is well worth the $9.99. This is a quick walk-through of how we got started with Minecraft Pocket Edition in our classroom. This is not meant to be explained as an "expert", which I am not, but as a person who is "working in progress".


Last year I began using Minecraft in the classroom. It was easy to access because students brought in their own devices, making it easy to allow the students to use it in class. Just because something is easy however, doesn't mean that it should be used. So I really had to sit down and think about how it could best serve a purpose in my classroom practice, and in meeting the curriculum standards.


At first, students wanted to use it to do every task. This wasn't really the best practice, so we quickly learned when it was a useful tool, and when it was not. I feel it's important that students have a wide variety of digital and hands-on tools to be able to do their work, so it was important to me that Minecraft was not the only tool they used.


The first thing to get out of the way is to remove the verb "playing" and replace it with "using". The last thing we want students to go home and say is today I played Minecraft all day. What we hope they will say is I was using Minecraft to create an ancient civilization with the knowledge I have learned from doing research. I used Minecraft to create that so that I can share with my class in a live presentation where we virtually toured the city.


The second thing to get out of the way is that we never use Minecraft as a free-time activity. It is never something to just play at school, or to fill in the time. It is a tool that we use purposefully to further our understanding of a concept, or to share our learning about curriculum.

Here is a poster about how we use Minecraft in the classroom:


With that in mind, let's take a look at some of the activities that have proven successful and would allow you to quickly get started with Minecraft in class.

Creating:

There are many math challenges that can be presented to students is a Minecraft activity. After they've learned a concept and shared it in a variety of ways, you can offer to them Minecraft as another method to share their learning. I find this works best, by not giving them the actual test to do, but rather by giving the challenge can you share this in Minecraft?


Students can represent fractions:

Build graphs:

Share addition, and subtraction strategies, represent multiplication facts.

Represent time: 


Share reflections, rotations, and translations:


Create patterns, share representations of area, perimeter, and volume. 

These are just a few ways that Minecraft to be used in in the math classroom, there are many more but try these to get started.


In Language, last year we created "Choose Your Own Adventure Stories" with Minecraft. 

The students wrote the actual story in the landscape of the world that they were in. They created a story that had alternate storylines, alternate endings and it all worked within the world. Minecraft can also be used to share the setting of a story there reading class, or to do a book report when they're finished a book, sharing the most important things they learned in their book in Minecraft.


Social Studies seems to be a perfect fit for Minecraft. There's so many different ways that they can represent their learning in Social Studies, by building and representing what they've created in Minecraft. Last year my students shared about what would be found in each of the provinces and territories of Canada, they created Ancient Civilizations, they created an Aboriginal Village with a longhouse, and they created both in urban and rural landscape in the Minecraft world.


Science concepts can also be shared in Minecraft. Students have created visuals to represent sound waves, inner ear diagrams, internal organs complete with labels and used it to present to their class.


Presenting:
So they have created something in Minecraft, but now how do they go about sharing it? We have used a variety of tools, it usually starts with taking screenshots on the device, and then adding those images into another up on the device.


We regularly use Skitch, available on Android and iOS, where we load the picture in and then use the arrows and different ways of making notes to share our understanding and to represent the different parts of the image we've created Minecraft.


We use iMovie, where we load the images into either a trailer, or an iMovie itself and do a voiceover explaining the different things were created in our Minecraft world.

Titanic from Scott McKenzie on Vimeo.


We use Google Slides/Presentation, although you could certainly also use Keynote, or even PowerPoint to share the images with both words on the screen, and presentation notes in order to do the presentation to the class.


This year, we have been using Green Screen by Do Ink, which allows the students to virtually be standing in their Minecraft world giving a tour much like a movie.


Pairs of students can also do a live presentation to the class, with one student taking a turn actually driving the students through on the screen as it devices hooked up to a projector and the other student stands at the front explaining what's happening then they switch and continued to explain so that both students get an opportunity to present to the class.


Sharing a World with Others Local, and Abroad:
Sometimes, we want to have the students working in the same world with other students. This is easy to do on the full computer version, but can be more challenging when using Pocket Edition. The secret is using an application called Pocketmine. It can be downloaded and used as an app on a smart phone, or it can be downloaded and used on a Macintosh computer, or a Windows computer. It allows you to run of a virtual server that runs a world in Minecraft where students can join from different devices, and from different places. Students from other sides of the world can join your world if you set it up properly. There are various tutorials online to help you set up your server.

This is a poster we created with some Minecraft Server rules:


This is not meant to be an exhaustive list, there are many other ways Minecraft can be used, these are just ways to get you started. I hope there is something helpful here for you, and I wish you well on your journey into a blocky, exciting classroom of opportunities!

Saturday 11 October 2014

Meaningful Collaboration with Google Hangouts, Kahoot, Padlet and Kidblog

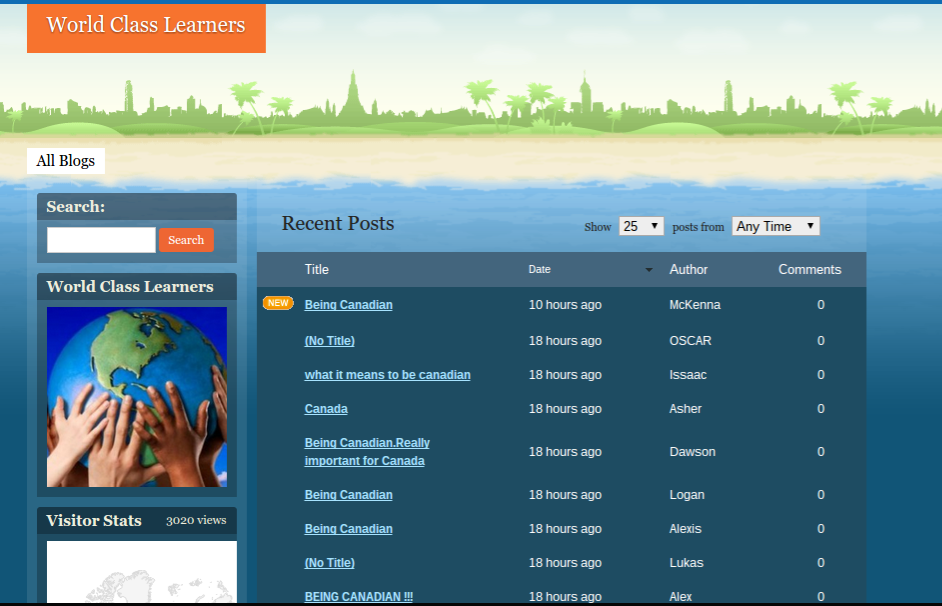
 This year my class is connecting with other classes around the world. Our Google+ community is: World Class Learners. We are creating a world class where students from different countries can collaborate together. In doing this, I'm constantly looking for different possible ways to share our learning, and interact with those other classes. Last year, a tool we found that was helpful, was Minecraft. This allowed our students to work together in a shared world. It was a very powerful experience.

image.jpg


Kahoot is an excellent resource. This is an interactive game show style application that allows the students to interact with each other. Using this app the students were able to learn to practice skills around the same topic. The interaction, created a festive spirit, and allowed the students to interact with each other in a slightly competitive, but fun way. This gave structure to the Google Hangout where the students would be sharing with each other, and made things go very smoothly.


Padlet is another important app, it allows the students to have a virtual space where they can put their ideas together. They can comment on each other's writing, and add images and share links. This app was a key part of having the students begin to put their ideas together, and our classes could share that information throughout a week or two of planning as we've met initially and then re-met consolidating that information.


A new app to me, is Green Screen by Doink. This iPad app is an excellent way for students to create a small presentation that can be shared with other classes anywhere in the world. The advantage of this app, is that the students are doing a live presentation which is also being videotaped, and whatever images they would wish to share are also embedded behind them so that the full experience is available to anyone who watches the video.

Room 9 monthly newsletter from Scott McKenzie on Vimeo.

This has a lot of possible ways it could be used, including having students virtually connect with each other through the green screen app. Meaning that both the students from the other part of the world doing a presentation, and our students doing a presentation could both be in the same presentation via the virtual screen.

The number one communication tool has been our shared blog so far, where students can write their ideas and share their thoughts. They intereact with each other, posting comments, and carrying on conversations on various topics. We are using Kidblog, it is very user-friendly, which matters when the students joining are doing so from several different countries.


To be honest, there's no one perfect application, no one thing that makes everything perfect. However, it's all the different possibilities the technology presents, that allows us to find the best opportunities to help students interact and collaborate anywhere, any time.


Friday 30 May 2014

Great Learning is Messy, But Fun: A Minecraft World with Friends from Korea

So my class recently linked up with a class in Busan, Korea. I met an excellent teacher through my PLN on Twitter. Mr. Richard Campbell @IpadEFLTeacher runs a school there and he is enthusiastic about the learning opportunities with Minecraft. We decided to have our classes work together in a linked Minecraft world where they would create something together.
image.jpg
My class had tried several activities in Minecraft this year, but we wanted to try something new. We came up with the idea for "Choose Your Own Adventure Stories". The students were turned loose in the world to start creating the setting for their stories. Like a lot of learning we have done this year, we played a bit before we set restrictions on anything. That makes for a messy start to many activities, but it also allows the students to be involved in setting the criteria for the learning adventure they are embarking upon.
image.jpg
It wasn't possible to turn the world off at night, because that was the Korean student's daytime when they were working and building. So the world was always open. That allowed for many neat opportunities. Students from Korea and Canada would normally not be able to meet, or communicate directly due to the time difference in their school days. But because students were able to go on and work at home, they were able to meet the Korean students and build with them in the evenings, and early morning. Yes, you read that right, they were voluntarily working at home building and creating this world for their stories.
image.jpg
Of course, this is where it got a little messy. As they were working outside of school hours, there was some challenges in working together. We met up at school the following day to talk about "spamming" animals (making so many that it interferes with other player's work) and "grieving" (destroying someone else's build). We sat together and came up with the rules for working together on the same world, and I was really proud of the students. We didn't accuse anyone, or mention specific offences, instead we decided what rules would help us to work successfully in the world.
image.jpg
A couple of students became OPs. This gave them control of how to change things in the world. One of the OPs had caused some of the damage at the beginning, he became the most fair adjudicator of issues in the game, helping others to avoid problems before they became bigger.
image.jpg
We decided to write about our successes using a shared world in Minecraft. We tried to think of the skills we were developing working together in this world. Here is some of the writing students shared:
image.jpg
image.jpg
image.jpg
The shared Introduction Board for students in Korea/Canada:
image.jpg
I think this has a lot of potential for international classes to work together, even when the time zones don't match. Next year my class will hook up with classes across the world, I think Minecraft will be one of the tools we utilize. We will be able to work inside the same world, collaborating and building our ideas together.
Kinda reminds me of the song...
"It's a Small World After All"!

Wednesday 30 April 2014

Kids can Code!: Apps and Websites we've Used to Learn to Code

Okay, first off a confession: when I decided I wanted to get the kids in my class coding on the computer I had NO IDEA how to do so. I just knew it was a good thing, and that it would give some chlldren a chance to shine.


The opportunity arose when Code.org offered the Hour of Code this year. This was a tipping point for a lot of educators, and I don’t think we can properly thank all the companies that offered Hour of Code resources. It is a ready-made, step-by-step walkthrough for beginners. Perfect for classes of eager students!


The truth is I had no idea about a lot of things i have tried this year, but I found that if I just dove right in fearlessly, the students would follow. We followed the acronym F.A.I.L. = First Attempt In Learning. Working together we proceeded through the steps of basic coding learning as we went. It came naturally to some students, and they then circulated and helped the students who were stuck on a level. We worked together and everyone was successful.


After the Hour of Code, we also took the opportunity to do the Flappy Bird: Code Your Own Game challenge at Code.org. This seemed even easier than the Hour of Code Tutorial, and the room was near silent as students interchanged blocks of code finding the right combination to complete a level. The real fun and creativity came at the end when everyone was able to individualize their game, adding their own twist to Flappy Bird’s original code. Here is a short video of a Grade 4 student explaining how he "modded" the game.


Gr. 3/4 student explains how he modded Flappy Bird on Code.org from Scott McKenzie on Vimeo.


We wanted to share our learning with other classes, so we found an app that would introduce the Kindergarten students to coding. Kodable is a great iOS app for this age group, and we started with the most eager Kindies. They started sharing their learning with the rest of their class, and soon their whole class was learning how to code. The Grade 1 students were also interested, so we taught them with Kodable as well.


There was a lot of interest from students in coding, so I decided to try a Junior Coding Club, and a Primary Coding Club. Both have had steady attendance from students and I have been asked weekly “Do we have coding club today?”


These are some of the Coding apps/websites I have been using. I will start with the easier apps I used for the youngest students, and they get progressively more challenging from there. This is by no means an exhaustive list, so please add on your own  in the comments below.


Primary Students:


Kodable: iOS app. Perfect way to introduce the basic coding commands. Great for Kindergarten as there is no reading required.

The Foos: iOS and Android apps, and it works on a computer (but not a Chromebook). No reading required, excellent for Kindergarten and up.


Daisy the Dinosaur: iOS app. Introduces the students to “block” coding. The only challenge I found was that it is difficult for the younger children to read the instructions.


Hopscotch: iOS app. This is a more advanced, greater choice/control app for children who have been successful with Daisy the Dino. I found a great tutorial on Youtube that walks students through some of the features of Hopscotch.

Snapcoding: works in the web browser (Chrome works best) and on tablets/chromebooks. This is a step up from Hopscotch, and introduces many more scripts that students can experiment with.


Light-bot: This app is great if you are a BYOD classroom. It is available on both iOS and Android, and their is an online version as well.


Tynker’s Hour of Code: online, a little more primary-friendly that Code.org’s Hour of Code.


Junior Students:


Snapcoding.com

MIT’s excellent Scratch online coding program. We have only scratched the surface with this, Hopscotch is a good way to get ready for this program as it is a fair bit more advanced.


Turtle Academy is another online program that teaches the LOGO language in steps.


Codecombat has a gaming format, and moves past the blocks and has the students writing actual javascript commands.


Khan Academy has a full program on offer as well. We are going to be trying this next!

Codecademy now has an iOS app as well as their interactive website.

Friday 11 April 2014

How Minecraft has Enhanced Student Learning (explained with the SAMR model)

This year I decided I wanted to try Project-Based Learning in my class. I knew that technology would enhance this approach, and I was ready with iMovie, Explain Everything, Educreations, Skitch, Haiku Deck, Google Sites, Wikis, ect. The previous year my students had made use of all these tools, and had learned to choose the best one for sharing their learning. I was missing a big one however…
A student approached me in class and asked if he could create an activity in Minecraft Pocket Edition. A 3D building block game on his iPod.  I wasn’t sure how it would work, and I felt it would take him far too long to complete. But I gave him a chance, and I was impressed with how quickly he was able to work. This student had difficulty with reading and writing at grade level, but in the span of 10 minutes he had created everything in three-dimensions that other students had created 2D on paper. He has difficulty with letter reversals, but every letter he had built was correctly represented. I was impressed.
Next we began using Minecraft to supplement other activities and ways of sharing our learning. I challenged the students in my class, I wanted everything they would normally present with a poster, or report. They easily surpassed my expectations, modding, and hacking the concept of a report. Instead of just writing information on a wall in Minecraft, we were being taken on a tour through their project. There were information sections embedded throughout the tour, and working models of what they had learned about. Everything important had been included and shared. Here is a tour of the Titanic by one of my Grade 4 students:

A lot of Problem-Solving opportunities arise as well. Recently, a few student were completed their work early and I gave them a class challenge. We were working on telling time, and measuring time and I wanted time to work with those that would need extra help in class.


“When you are finished… see if you can create a clock in Mincraft… That works!”


At home this might be possible when they are working on the full powered Minecraft application, but Minecraft P.E. has limits as it is designed to work on portable devices. An alternate was to create a clock in Minecraft that was telling a particular time, or show measurement of time.


There was near silence in the room as students finished their work. Occasionally they would confer with each other sharing a strategy, or design that was working. These mini projects were all completed in about 20 minutes.

This student created a sand clock, that cleans up after itself, so that it can be used over again:

Here is a student who created a “working” clock. It isn’t accurate (to scale) but he has “hands” moving at second, minute and hour intervals:


This student had a similiar idea. I challenged him to see if he could build his clock to scale. He went home that night, and returned the following day with a successful model:


These girls worked on measuring time. They created two clocks, and showed how much time had elapsed between the two clocks:


Social Studies just seems custom-made for Minecraft. The opportunities are endless. Any place you learn about can be recreated in Minecraft. Here is a Medieval Village shared in Minecraft:

I have tried to use Ruben R. Puentedura's SAMR model this year to look at how I am using technology in my teaching. The SAMR model helps us to reflect on whether or not we are making full use of the possibilities with technology.


I thought about how Minecraft had changed the possibilities for Report Writing/Presentations:


The lowest level is Substitution: 
-tech acts as a direct substitute  
-instead of writing report on paper, students type on computer.

The second level is Augmentation 
-direct substitute with functional improvement 
-importing images from the internet into their report

The third level is Modification 
-tech allows for a significant task redesign 
-for me this is where Minecraft comes into play 
-students started by creating 3D models of what they were learning about, then took screenshots, or short video clips and used them in reports

The fourth level is Redefinition 
-tech allows for the creation of new tasks, previously inconceivable 
-creating a report inside a game, writing the important information through each level, or learning space in the 3D environment
-NEW PRESNTATION MODE: sharing that world on a projector hooked up to their device, flying through their created project and visiting each area of important information 

The best part of it all is that I am not the clever one here at all. I didn’t move up through these levels, I just challenged my students to improve their design, and explain their thinking clearly, they did the rest. I didn’t move through the SAMR model, my students did… with Minecraft.

These are some other blog posts I wrote on the use of Minecraft in class this year:

http://technorookie.blogspot.ca/2013/10/minecraft-motivation-factor.html

http://technorookie.blogspot.ca/2013/10/minecraft-in-math-problem-solving-and.html

http://technorookie.blogspot.ca/2014/02/awesome-ideas-project-based-learning-by.html